
Installing a giant LED screen involves several critical steps: site preparation, pitch selection, load-bearing structure, electrical power, LED display configuration, and final calibrations. This technical sequence determines the quality of integration for the device, including for outdoor giant LED screen installation.
Site Preparation Before Installing a Giant LED Screen
It all starts on the ground. The location, available structure, access points, and load constraints must be reviewed together before any assembly begins.
Essential Criteria for Choosing the Location
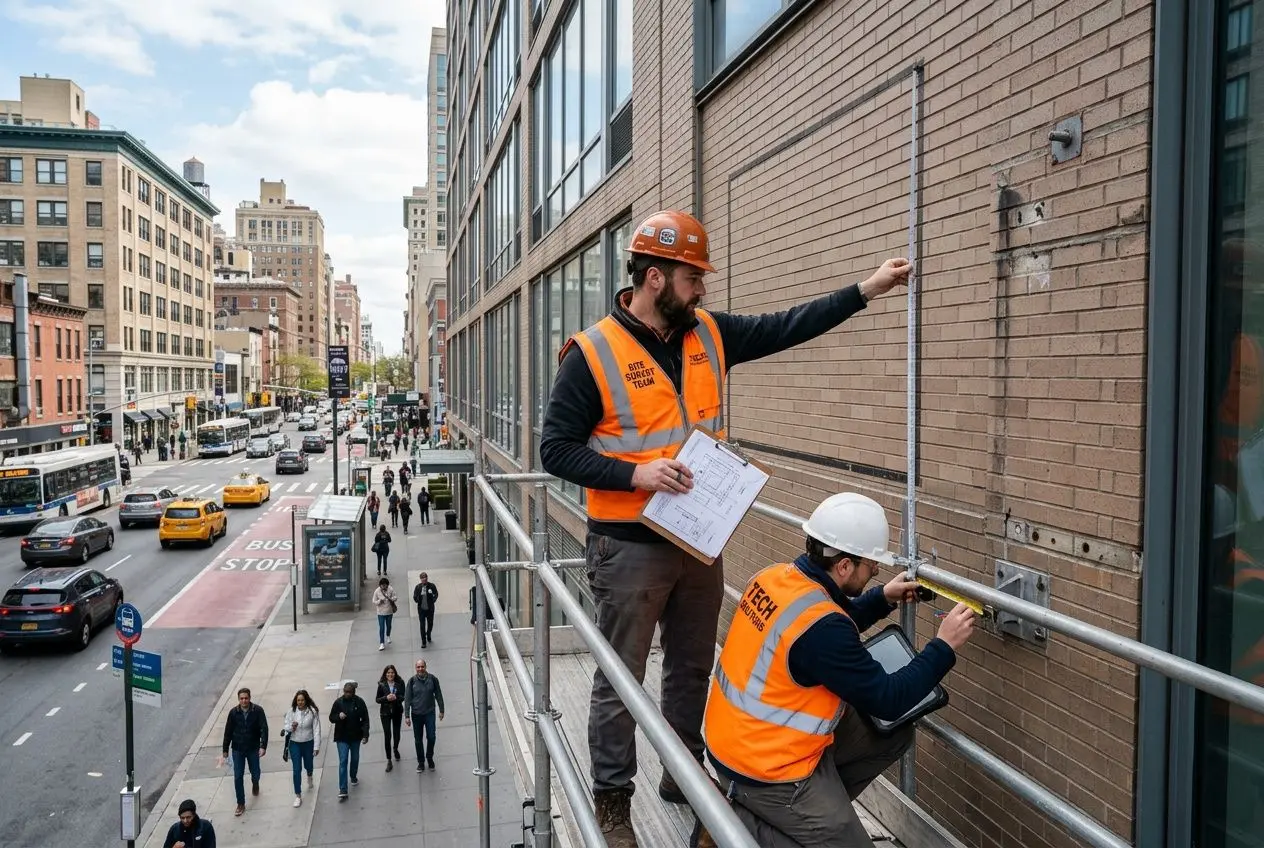
Selecting the right location for an LED screen requires a precise site visit. The goal is to balance foot traffic, visibility, maintenance access, and mounting height consistent with reading distance: what the eye retains is how easily the message registers in the field of view.
- Footfall rate: This is the primary filter. A location exposed to dense pedestrian or vehicle traffic increases the reach of both an outdoor and an indoor giant LED screen.
- Viewing angle: The screen should remain readable without forcing the audience to move. In areas with cross-circulation, a viewing cone of 160° provides a solid baseline.
- No obstructions: Trees, street furniture, signs, or nearby buildings must be checked from multiple approach angles, not just from directly in front of the screen.
- Maintenance access: A good location is not judged only on installation day. The clearance needed for future maintenance must be planned from the rear and sides, depending on the chosen installation method.
The CREPS Pays de la Loire specification for a 7.68 m × 4.48 m outdoor LED screen mounted at 12.60 m height illustrates this approach well: required brightness, waterproofing, remote control, and installation conditions are all spelled out in detail.
Site Technical and Environmental Constraints
Once the location is identified, the technical analysis takes over. A south-facing facade may require up to 7,500 nits to maintain readability, while a wind-exposed area demands a structural load calculation before installing a giant LED screen.
The screen weight directly influences the assembly and mounting method. Depending on the pitch chosen, dimensions, and cabinet type, it can range from 80 to 400 kg. This difference matters for integration, especially between facade mounting, wall attachment, pole mounting, or a freestanding structure.
Outdoors in rain-exposed locations, an IP67 rating may be necessary. In coastal or high-altitude areas, extruded aluminum structure with stainless-steel fasteners provides better long-term resilience. The giant LED screen must also comply with CE requirements and local permits, sometimes limited to eight years when visible from public roads.
Electrical Infrastructure and Networking
After site and structure assessment, the electrical supply calls for specific analysis. Typical consumption of 120 to 200 W/m² under normal use, with peaks reaching 2,000 W/m² on highly bright configurations, may require panel upgrades, circuit protection, and dedicated lines before LED screen installation.
Ethernet, fiber optic, Wi-Fi, or GSM connections can all work depending on the location and intended use — provided conduits, access points, and cabling are planned during site setup. In real installations, control signal stability directly affects display continuity and update responsiveness.
FlexLedLight custom LED screens come equipped with sending cards that can identify every pixel on every cabinet. Once installation is complete, this control system allows brightness adjustment and remote operation, ideal when aesthetics matter and the screen should remain simple to manage.
Installation Steps and Timeline for a Giant LED Screen
Giant LED screen installation follows a precise sequence: unpacking, assembly, data cabling, and then electrical connection. Any wiring error shows up immediately on the screen, with image instability or display defects. For a complete installation, you should typically allow about eight weeks between order and commissioning.
Unpacking, Assembly, and the Easy-Lock System
The giant LED screen installation time begins before the first plug-in. Unpacking requires at least two qualified technicians, handling modules slowly and carefully: LEDs placed at corners and edges are most vulnerable to impact during height work. At any elevation, proper safety equipment, including harnesses, is mandatory.
Next come the assembly of the cabinet frames. Easy-Lock latches ensure horizontal and vertical connections without special tools, reducing installation time while maintaining overall rigidity. This is where a modular giant LED screen proves its value: easier transport, smoother assembly, and realistic adaptation to large surfaces or restricted access points. Modular modules also simplify transport over constrained access areas or large footprints.
Pitch Selection, Data Cabling, and Electrical Power
Before installing an LED screen, the pitch selection must be decided. The LED pitch for viewing distance determines both the perceived sharpness and the connection density required: a P1.5 pitch, designed for reading between 0.5 and 1 m, demands far more pixels than a P4.8 meant for viewing beyond 4 m.
Data cabling follows a zigzag path through columns: starting from the bottom-left cabinet connected to the DATA IN port, then chaining DATA OUT ports to the next DATA IN ports. This series logic maintains signal continuity across the entire giant LED screen. Conversely, a reversed connection is enough to create dead zones or flickering.
Electrical power follows the same structure. The mains plug connects to POWER IN on the first cabinet, then each POWER OUT feeds the POWER IN of the next, in the order defined by the FlexLedLight technical documentation. Proper power distribution secures the entire giant LED screen installation and minimizes power fault risks.
Calibration and Commissioning
Once the structure is in place, calibration prepares the display. A lux sensor mounted on the facade measures ambient light to automatically adjust brightness: 600 to 1,500 nits indoors, and at least 5,000 nits outdoors.
After installation is complete, commissioning is done by synchronizing content via the internet, with no additional manual tuning required.
Structure Types and Mounting Techniques
For a giant LED screen, four configurations dominate in real installations: wall mounting, suspension, freestanding structure, and mobile solution. Each responds to a specific context, with different load, height, and maintenance constraints, whether it is a giant indoor LED screen or a permanent outdoor setup.
Wall Mounting and Masonry Anchoring
The most common giant LED screen mounting structure in commercial environments is attachment to a load-bearing wall. The assembly relies on anchor bolts fixed into masonry, with a clear objective: distribute the load across the usable surface of the structure. This technique adapts to storefront facades, reception hall video walls, and stadium LED screens, provided the support load capacity is validated before installation.
This choice also requires a rear technical clearance. This space facilitates routing of video cables, improves access to power supplies, and avoids complete disassembly during module replacement. Outdoors, the LED screen fixing technique must factor in wind load in the anchor calculations: regulatory compliance remains a higher priority than visual effect, with CE marking, administrative permits, and permitted height according to the local advertising regulation to be included in the technical file.
Suspended, Freestanding, and Mobile Structures
When the support does not allow direct attachment, other solutions come into play. Suspension is frequent in performance halls, shopping centers, and exhibition spaces, as it frees up floor circulation and opens wider viewing angles. The structure must then be sized by an engineer, with at least two anchor points and independent safety cables: what the eye sees is the image, but EN 1808 lifting standards apply as soon as the load exceeds 200 kg.
- Suspended mounting: suitable for large volumes, with a minimum of two anchor points, calculated beams, and redundant safety.
- Freestanding installation: aluminum leg structure with anti-tip system, preferred when no wall mounting is possible.
- Event mobile structure: designed for temporary use, at festivals or trade shows, with quick assembly depending on the site readiness level.
- LED trailer: screen on a wheeled chassis, useful for moving between sites without fixed infrastructure.
Conversely, a screen placed directly on the ground without a dedicated structure is limited to small indoor formats, up to 2 m², with a steel safety cable. As soon as the giant LED screen purchase project is intended for long-term use, a technical opinion becomes necessary for any placement on a roof, canopy, or any structural singular point. The difference lies in integration: a well-studied installation simplifies future maintenance as much as it secures daily operation.
Cost of Professional LED Screen Installation in Paris
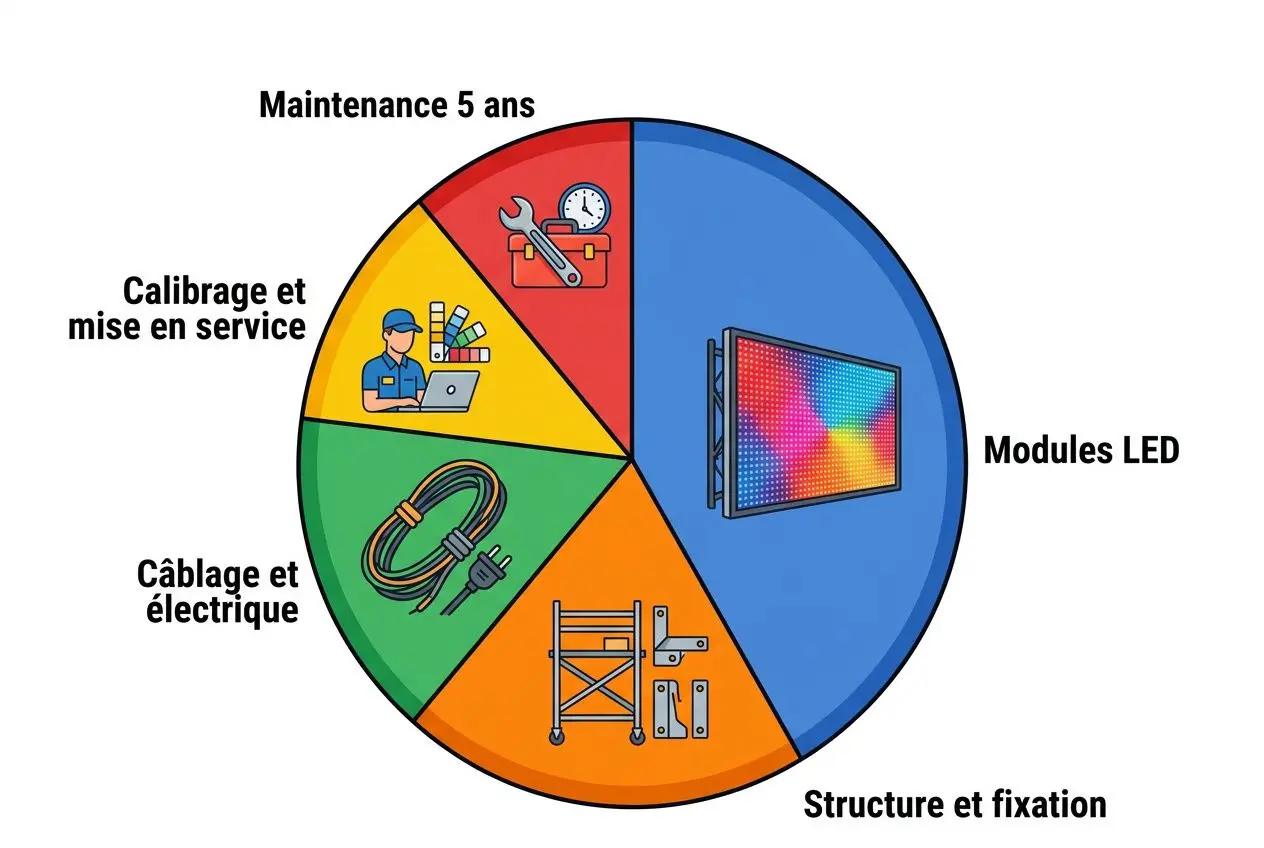
The cost of installing a professional LED screen is never just the screen itself. In real installations, the budget also includes the mounting structure, electrical supply, networking, commissioning, calibration, and planned maintenance over several years.
Factors Influencing the Installation Budget
The primary lever remains the pitch. A P1.5 screen designed for close reading carries a higher cost than a P4.8 model meant for distance visibility, because pixel density, processing load, and calibration requirements differ. The return depends on the actual viewing distance: a pitch that is too fine inflates the bill without any perceptible benefit to the audience.
Next comes the installation context. Screen dimensions, height, site accessibility, and structure type directly affect assembly time, lifting equipment needed, and safety measures required. Conversely, a straightforward wall mount on an already-sized support often reduces intervention volume.
The technical environment weighs just as much. An undersized electrical panel, missing network conduit, or facade constraint in a dense zone can rapidly escalate the cost of installing a professional LED screen, especially in Paris where every construction site access must be anticipated. The difference lies in integration: the more a screen is planned with its maintenance access and technical clearances from the start, the more the overall cost stays manageable.
- Pitch and dimensions: fine pitch (P1.5 to P1.9) increases pixel density and price per m², adjusted to the minimum reading distance.
- Structure type: wall mounting remains the cleanest solution; a suspended structure with a calculation report, or an LED trailer, engages a higher budget.
- Infrastructure level: electrical supply, network, protections, and service access directly influence the construction load.
- Maintenance: technical support and spare parts over 5 years should be included from the start in the operating budget.
Equipment choice also influences long-term costs. Modular systems simplify transport, speed up cabinet replacement, and minimize downtime, while solutions with integrated multi-media players suit simple use cases with infrequent updates. Prefer options when light is part of the decor: a screen designed to be accessible from the rear or front often costs less to maintain over an estimated lifespan of 7 to 12 years.
To buy a giant screen, you should also look at real consumption. Under normal use, it ranges between 120 and 200 W/m², with peaks reaching 2,000 W/m² for a 5,000-nit screen exposed to direct sunlight. A Common Cathode architecture reduces this expense by 20 to 40%, which can represent over €1,500 in annual savings depending on surface area and operating hours.
Energy Optimizations to Reduce Costs
In a professional LED screen installation project in Paris, energy gains are decided early. Once the technical sizing is consistent, combining Eco Mode, light sensors, Common Cathode architecture, and programmed night shutdown between 11 PM and 6 AM can reduce consumption by 40 to 55%. Depending on usage patterns, this represents a yearly saving of at least €600 to €800.
The facade-mounted lux sensor automatically adjusts brightness to ambient light. This setting avoids maintaining excessive brightness when ambient light drops, refining energy control without adding manual action.
Night shutdown alone generates between €330 and €660 in annual savings. Once the operating calendar is set based on site activity, the effect on expenses remains clear month after month.
| Optimization | Consumption Reduction | Estimated Annual Savings |
| Eco Mode | 10 to 20% | Varies by surface area |
| Light sensors | Up to 40% | Varies by sunlight exposure |
| Common Cathode architecture | 20 to 40% | + €1,500 annually |
| Night shutdown (11 PM to 6 AM) | Proportional to hours off | €330 to €660 annually |
| Combined optimizations | 40 to 55% | €600 to €800 minimum annually |
Common Issues and Maintenance of Giant LED Screens
Even a well-specified screen can lose reliability if installation is done without method. In real installations, defects often appear during assembly: imprecise cabling, poorly anticipated placement, underestimated ventilation, or unsuitable structure. Identifying these points early and organizing clear preventive maintenance limits service interruptions and avoids progressive performance degradation.
Frequent Errors During Installation
The most common LED screen installation issue remains data cabling errors. A single reversal in the zigzag chain is enough to create dead zones or flickering on one or more module columns. Technical documentation specifies each connection, but the difference lies in integration: every connection must be checked on-site, step by step, during assembly.
- Excessive pixelation: A screen with too wide a pitch for the minimum viewing distance loses readability on text, logos, and fine details. Pitch selection should always be based on the closest viewpoint, never a theoretical average.
- Camera flicker: A refresh rate below 3,840 Hz causes flicker visible through camera lenses. This technical check must be done before handover, especially for live-streamed or broadcast events.
- Poorly calibrated brightness: A screen that is too dark in daylight or too aggressive indoors often signals absent calibration. For proper LED screen installation, a lux sensor remains the foundation.
- Inadequate IP protection: Outdoors, exposing a screen to the elements without a minimum IP65 front rating accelerates failures linked to humidity and dust.
Less visible but equally important: ventilation. When air does not circulate well behind modules, heat builds up, components wear faster, and maintenance becomes heavier. Return depends on installation: plan thermal clearances consistent with the location, then verify nothing blocks the grilles once installation is complete.
Preventive Maintenance for Longevity
Maintenance of giant LED screens, whether for events or permanent installation, relies on a simple but regular routine. It includes inspecting modules and control cards, checking cabling and connectors, and cleaning display surfaces.
When an anomaly appears, corrective maintenance takes over: replacing a module, intervening on an electronic card, verifying a power supply or data signal. Modular design simplifies this work, as a single cabinet can be changed without removing the entire structure. For installations exceeding 20 m² or under intensive use, more than 12 hours/day, a five-year contract with spare parts and technical support limits the risk of costly downtime.
Solutions for Events and Temporary Rentals
For a festival, trade show, or any temporary event, the logic shifts. Mobile solutions, rental giant LED screens, and LED trailers address this use case by minimizing heavy construction and avoiding permanent anchoring in the building.
Adjustable surface, quick assembly, anti-tip device, and reduced need for specialized tooling: what the eye retains is image presence quality. Yet this quality depends first on the load-bearing structure, ground conditions, technical access, and proper screen sizing for the venue. Unlike a permanent installation, a mobile LED screen demands precise logistical preparation.
On the operation side, content delivery can use a USB key, integrated multi-media player, or local Wi-Fi connection, depending on the update cadence. Once power is connected and media synchronized, the screen becomes operational within a few hours with two experienced technicians. With two experienced technicians and an approved location, electrical access, weather constraints, and load-bearing ground, commissioning typically takes two to four hours.
Frequently Asked Questions
How long does installing a giant LED screen take?
For a giant LED screen, you should typically allow about eight weeks between order and commissioning.
Next comes the assembly itself: Easy-Lock assembly, zigzag cabling, and calibration. This phase requires a minimum of two qualified technicians for one to several days, depending on the screen size and planned structure. Conversely, for an event on a mobile structure, deployment can be done in just a few hours.
Which pitch to choose based on viewing distance?
The right pitch is defined from the minimum distance between the audience and the screen.
For viewing between 0.5 and 1 m, a P1.5 pitch is required. Between 2 and 4 m, a P1.9 to P2.6 covers most commercial and event use cases. Beyond 8 m, a P3.9 to P4.8 suffices to maintain good readability: what the eye retains is perceived sharpness at the actual observation distance.
Which IP certifications are required for an outdoor screen?
For an outdoor LED screen installation, exposure to the elements requires appropriate protection. On the facade, IP65 is the minimum to resist dust and directional water jets.
At the rear, an IP54 rating is recommended to contain splashes and temperature variations between −20 °C and +55 °C. When the site is subject to heavy rainfall, IP67 on the front face adds extra safety margin, with resistance to temporary immersion up to one meter.
In environments exposed to vandalism, an anti-vandal polycarbonate window can supplement the protection.